Heat Marks on Wood: Causes, Fixes, and Care

You set a hot mug, casserole, or laptop on the table for a minute, then lift it to find a pale ring or a brown spot. You wipe it once, then harder, and nothing changes. That's the confusing part about heat marks on wood. Some marks sit in the finish and may ease with careful, low heat. Others mean heat changed the wood itself, and wiping, scrubbing, or reheating can make a small spot bigger. Your first job isn't choosing a remedy. It's reading which layer you're looking at, especially in humid Kennesaw and Acworth summers when heat and leftover moisture often arrive together.
Table of Contents
Read a Heat Mark Before You Treat It
Start with one split. A white or cloudy ring that's still smooth usually sits in the finish, not in the timber. A dark brown or black mark, rough grain, blistering, or a smoky smell points deeper. That difference decides whether you're dealing with a surface you can test gently or damage you should leave alone.
Heat from a mug, dish, or pan can soften shellac, lacquer, wax, or another coating, and moisture from condensation or the heated object can get trapped in that softened film. The conservation guide to finishes, polishes and surface coatings explains that as the surface cools, trapped moisture scatters light and produces a pale, opaque ring. Shellac is especially vulnerable because it softens with heat and stays susceptible to moisture, so hot cups and plates are a common source of damage on shellac-finished tables.
What the mark means and what to do next
| What you see | Likely layer | Safe first move | Stop if |
|---|---|---|---|
| White or cloudy ring, smooth to the touch | Moisture trapped in a softened finish | Remove heat and liquid, let it return to room conditions, then test only a low-heat method in a hidden spot | Sheen changes, bubbles, odor, or the mark darkens |
| Pale ring on shellac, lacquer, wax, or varnish | Coating softened by heat | Identify the finish if you can and test an inconspicuous area first | Alcohol, steam, or an iron dulls or melts the film |
| Brown or amber spot | Early heat darkening of stain, finish, or wood surface | Clean loose residue only and protect the spot from more heat | Color deepens or the grain raises |
| Black, brittle, or powdery patch | Charring or carbonization | Do not scrub, sand, bleach, or reheat | Any smoke smell, crumbling, or loss of a solid surface |
| Blister, crack, or lifted veneer | Finish failure or movement in the wood | Leave it alone and arrange a furniture-restoration look | The film is tacky, the veneer lifts, or a joint opens |
Read the table by touch as well as color. Run clean, dry fingertips lightly across the edge. Smooth suggests the film is still intact. Rough, raised, brittle, or tacky means you're no longer looking at simple haze, and rubbing can tear a weakened coating or spread a dull patch.
The same hot pan can mark oak, pine, and a factory-finished floor differently. Species, moisture in the wood, how long the object sat there, and the coating all change the result. In a Kennesaw kitchen, a warm cup set on a table you just wiped can trap moisture faster than the same cup on a fully dry, cured top in Marietta or Woodstock.
First move: Photograph the mark in daylight, feel whether it's smooth or rough, and match one row in the table before you touch a product or plug anything in.
Ordinary cleaning may clear crumbs, grease, and haze around the spot and still leave the color. That doesn't mean you didn't clean well enough. For general habits that protect a finish day to day, the wood care advice from Lott's Furniture is a useful place to check how routine dusting and barriers fit together. Remove the heat and moisture source first, let the surface return gradually to room conditions, and skip aggressive rubbing, sanding, bleach, steam, and forced heat until you've named the mark.
Why Heat Changes the Color of Wood
Think of toast. Bread doesn't brown because dirt landed on it. Heat changes the food itself, and you can't wipe toasted bread back to white. Wood works in a similar way, only slower and less evenly. Once heat changes the material under the finish, you're looking at a color change inside the fibers, not soil sitting on top.

The chemistry under the color
Wood contains hemicelluloses, lignin, and extractives. Heat drives degradation and oxidation in those components, and those reactions shift the color toward yellow, red, amber, or brown. You don't need to memorize the names. Just remember that the color is coming from a changed ingredient, not from a spill you can lift off with a cloth.
The 2022 review of wood high-temperature heat treatment technology reports that as treatment temperature rises, lightness (L) decreases* while total color difference (ΔE) increases*, producing visibly darker surfaces. In plain terms, hotter exposure makes a bigger, darker change that your eye can measure. In one rubberwood study summarized in that review, temperature was the strongest processing variable, followed by treatment duration and then heating rate, and the reported optimum for that tested process was 190 °C for 4 hours at a heating rate of 10 °C per hour.
Time matters almost as much as peak heat. Another experiment reported in that review found that after 20 days at 110 °C, the redness value reached 4.5 times its initial level. That's well below an open flame. It helps explain why a lamp base, a warm appliance, or a dish left during a long holiday meal can leave a persistent tint even though nothing ever smoked.
A heat mark is often a color change in the material itself, not dirt on top of it.
Why a pan is harsher than an oven
Industrial heat treatment spreads warmth around a whole board. A household accident does the opposite. A pan, iron, curling tool, or ember dumps heat into one small contact patch, so that circle can darken while the rest of the tabletop looks normal. The sharp edge you see is the edge of that hot footprint.
- Species and grain: Oak, pine, and other woods start at different colors and darken at different rates.
- Moisture and finish: A damp surface or a softened film lets heat and water interact in ways a dry, hard finish may resist longer.
- Contact time: A mug lifted in seconds is different from a slow cooker sitting through dinner in a busy Acworth home.
That's why two marks from the same object don't always match. One may stay pale and milky in the coating. Another may turn amber because heat reached stain or wood. Wiping can remove residue around either mark, and that's worth doing gently. It can't un-cook darkened fibers, and harder scrubbing only risks removing finish around a color that cleaning was never going to reverse.
From a Light Mark to Real Charring
A pale ring and a brittle black patch sit at opposite ends of a heat-damage ladder. First, moisture leaves the wood. With more heat, the wood's components break down chemically through pyrolysis. At the final stage, the surface chars, turning black and brittle or powdery as carbonization advances.
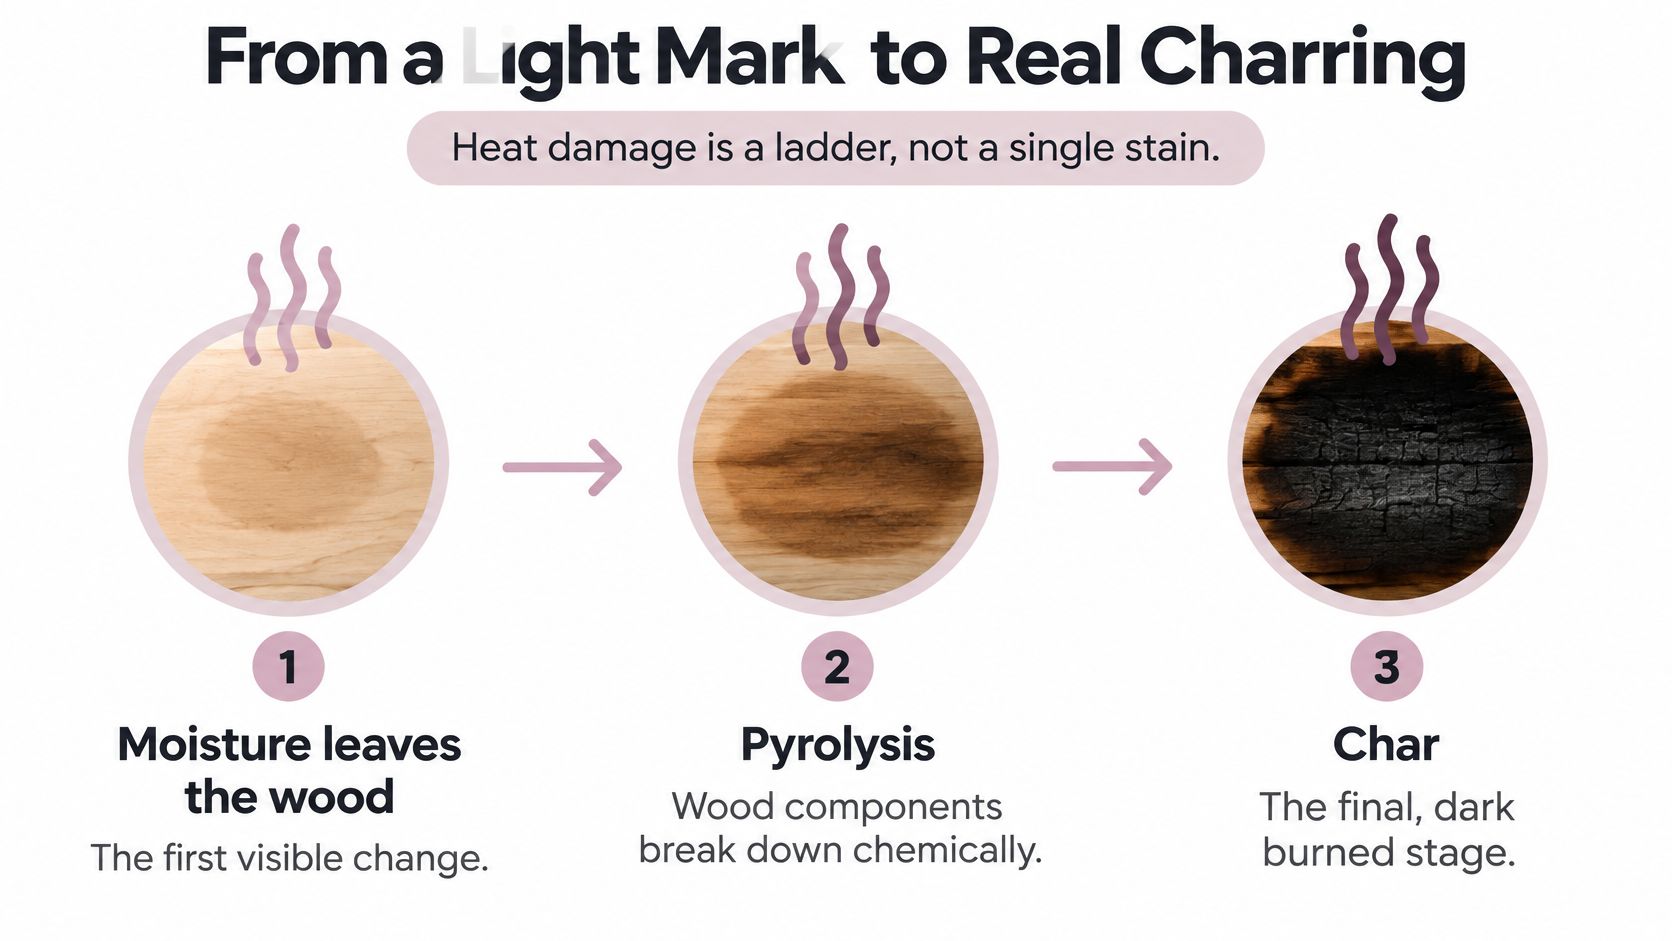
An experimental study of wood heating/03.pdf) found about 9% mass loss at 200 °C, rising to more than 50% at both 300 °C and 400 °C. At 400 °C, char production became the dominant process. Mass loss means wood itself has been consumed, so polishing cannot restore it.
Heat milestones from moisture loss to char
| Temperature | What the study found | What a household mark can mean |
|---|---|---|
| About 110 °C for 20 days | Wood redness increased during prolonged heating | A red or brown tint can form without a flame |
| 170 to 210 °C for about 6 hours | Controlled heat treatment darkened wood without ignition | A dark spot does not prove the piece caught fire |
| 200 °C | About 9 percent mass loss | Early thermal change, often a brown or amber patch |
| 300 °C | Mass loss above 50 percent | Serious breakdown, not a wipe-off stain |
| 400 °C | Mass loss above 50 percent and char is the main product | Black, brittle, or powdery carbonization |
Use these milestones to judge the type of damage, not to estimate the temperature of a pan. A brown or amber patch can signal early thermal change. Black, brittle, raised, or powdery areas suggest more extensive breakdown and possible loss of strength. A chair leg, step, or thin tabletop edge with that texture needs more caution than a color change alone.
Sanding can turn one dark spot into a wider repair. It removes finish, changes the sheen, and may cut through veneer before reaching undamaged color. If a smoke odor remains after the surface cools, or the finish stays tacky, cracks, or the panel warps, stop household treatment. Take clear photos and ask a furniture restorer to assess the coating and any char before sanding, bleaching, or recoating.
Name the Finish Before You Add Heat
Before any dryer or solvent, name the coating if you can. Shellac, lacquer, varnish, wax, oil, and modern catalyzed finishes don't share one safe chemical or one safe amount of heat. A method that releases moisture from one film can soften, dull, gloss, or bubble another. That's where many well-meant fixes go wrong.
The Wood Magazine guide to removing rings distinguishes shellac from lacquer and recommends different solvents for each. Treat that as your warning label. Finish identification isn't an optional detail for experts. It's the step that tells you whether a home test is reasonable at all.
A small hidden test
- Pick an inconspicuous spot: Try the underside of a tabletop, a back rail, or an inside drawer edge, not the middle of the ring.
- Use one drop: Dampen a cotton swab with denatured alcohol and dab once. Don't flood the area or wipe across the mark.
- Watch for softening: Shellac softens or turns tacky quickly with alcohol. If the hidden spot changes, stop and don't use alcohol or aggressive heat on the visible surface.
- Read a no-change result carefully: If alcohol does nothing, the coating may be varnish or a factory catalyzed finish. Heat, steam, and an iron can still dull or bubble those films, so no change doesn't mean anything goes.
- Consider wax or oil: Those finishes have little film to trap a milky ring. Haze may sit in wax, while brown or black color is more likely in the wood and won't wipe away.
- Write it down: Note the result beside your daylight photo so you don't retest the same spot repeatedly.
Moisture problems in wood often need the same pause before treatment, whether the issue is a ring, odor, or a damp board. If you're sorting out a different wood moisture problem at home, our guide to getting urine smell out of wood follows that same identify-first approach. The product is different, but the habit protects you. Test small, watch the finish, and stop when texture or sheen changes.
Use a low-heat dryer only on a smooth white or cloudy ring whose hidden test didn't dull, melt, darken, or turn tacky. An heirloom, a piece in a rental, or an unknown catalyzed top should go to a furniture restorer instead. You're not being overly cautious. You're avoiding a larger refinishing bill for the sake of a ring that might have stayed faint.
How to Ease a White Heat Ring
More heat is not a universal cure. Gentle warmth can let trapped moisture leave some finishes. It can also soften shellac, bubble lacquer, or change the gloss of a factory top so the repair catches light differently from the rest of the table. Limit this routine to a fresh, smooth, white or cloudy ring on a finish you're willing to test, and don't expect a guaranteed disappearance.
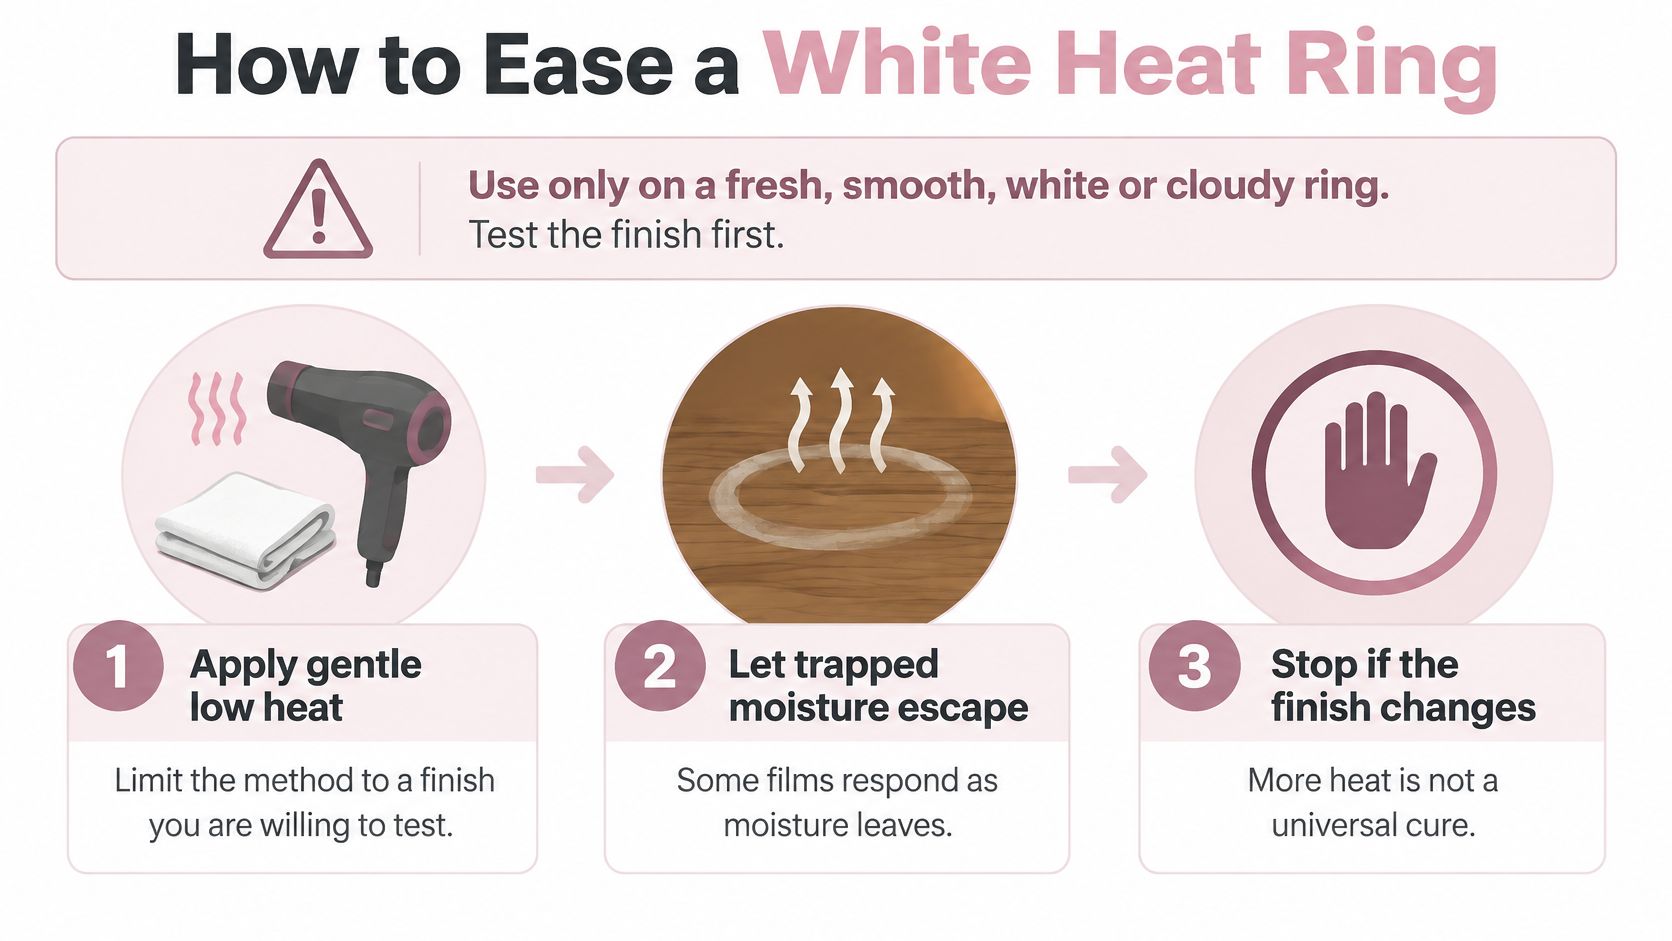
The low-heat routine
- Remove the source: Take away the hot object, coaster, placemat, and any standing liquid. Don't set anything back on the spot while it settles.
- Let it return to room conditions: Give the surface time to cool on its own instead of blasting it right away. A rushed second dose of heat is hard to judge.
- Clean and dry first: Wipe with a barely damp cloth, then follow with a dry cloth. You don't want to warm a wet film or drive cleaner into a softened finish.
- Test a hidden area: Try the dryer briefly on an underside edge or back rail with the same finish. Stop if the sheen shifts, the film feels tacky, or you notice an odor.
- Use the lowest dryer setting: Hold a hair dryer several inches away, keep it moving back and forth, and work for a few minutes at most before checking. Never rest the nozzle on the wood.
- Check often: Lift the dryer away and look at the ring in normal light. Stop at the first bubble, smell, dull patch, wavy gloss, or darker color.
- Cool and dry completely: Leave the spot uncovered in gentle room air. Don't polish, wax, or cover it while warmth or moisture may still be in the film.
- Buff only when cool: Use a soft, dry cloth with light pressure. If a faint ring remains and the finish looks unchanged, one more short pass is safer than one long, hot pass.
That sequence matches the Better Homes and Gardens guidance on removing heat stains from wood, which recommends cleaning and drying the surface first, testing in a hidden area, and using a hair dryer on its lowest setting while moving it back and forth for a few minutes. The goal is gradual warming so trapped moisture can escape without scorching or melting the coating. Afterward, let the surface cool and dry completely before you gently buff it with a soft cloth.
Why a dryer beats an iron as a first tool
An iron sits hotter, concentrates pressure, and can imprint cloth texture into a softened finish. It's also harder to pull back in small increments. A moving dryer gives you distance and lets you stop mid-pass. For floors, the same caution applies, and our guide to hardwood floor water stains can help you separate a surface mark from moisture that has reached the boards.
Holiday hosting in Acworth and Kennesaw creates exactly this kind of fresh ring, a warm serving dish set down while you're clearing space for guests. A careful early pass may help that new, smooth haze. It won't fix a brown scorch, lifted veneer, or a finish that bubbles under the dryer. If the hidden test looks wrong, or the piece is an heirloom or part of a rental in Cartersville or Hiram, photographs for a restorer are the safer next step.
Stop while the finish still looks like itself. A faint ring is easier for a restorer to address than a melted or unevenly glossed patch.
Keep Humidity and Heat from Teaming Up
A repair can look fine on Saturday and haze again the next week if the room works against it. Wood swells and shrinks as humidity changes, while many finishes move less. That mismatch can stress the bond between film and wood, so a coating may haze, flake, crack, or lose its grip after repeated swings.
The conservation guidance on water rings, stains and finish damage notes that the U.S. National Park Service recommends approximately 50% relative humidity, with a practical target range of 45 to 55% for wooden objects and a warning that relative humidity should not exceed 65%. You don't need museum equipment to use that idea. In a humid Georgia summer, steady indoor air and fully dry surfaces matter more than fast, forced drying after a steamy kitchen or a damp cleaning cloth.
Habits that prevent the next heat mark
| Habit | Why it marks wood | Do this instead |
|---|---|---|
| Hot pan or mug on a bare finish | Softens shellac, lacquer, wax, or varnish | Use a trivet or thick dry barrier and remove it promptly |
| Warm dish on a just-wiped surface | Heat drives leftover moisture into the film | Dry the top completely before serving |
| Plastic cover while the top is damp | Holds moisture against the coating | Leave it open to gentle room air |
| Iron or heat gun on a dark spot | Can imprint, bubble, or char the finish | Stop and ask a furniture restorer |
| Steam mop on hardwood | Swells wood and stresses joints and film | Use a barely damp cloth, then dry |
| Piece against a radiator or hot window | Long, uneven heat stresses the coating | Move it and keep airflow moderate |
Use the table in the order you'd meet these moments at home. Put a trivet or thick, dry barrier under hot dishes, then remove it promptly so trapped warmth and moisture don't sit against the film. Dry a tabletop fully before you set down a warm mug. Heat plus leftover moisture is a different problem from a dry cup on a cured finish.
Don't seal a freshly treated top under plastic, move it beside a radiator, or chase a ring with a heat gun. Skip steam mops on hardwood and don't let cleaner pool at joints, edges, or seams. A barely damp cloth, then a dry pass, removes everyday soil without soaking the finish. Stable room air beats rapid drying every time.
If odor, lifted veneer, darkened joints, or a tacky film shows up, stop and don't polish over moisture. Polish can seal in the problem and make later repair harder to judge. Recurring weekly, biweekly, every 3 weeks, or monthly cleaning helps because spills, sticky film, and grit don't build up and invite harder scrubbing later. That applies in a home office or an HOA clubhouse in Powder Springs just as it does at a family dining table, as long as wood is treated as a finish to protect rather than a spot to steam.
Choose Repair or Care Around the Piece
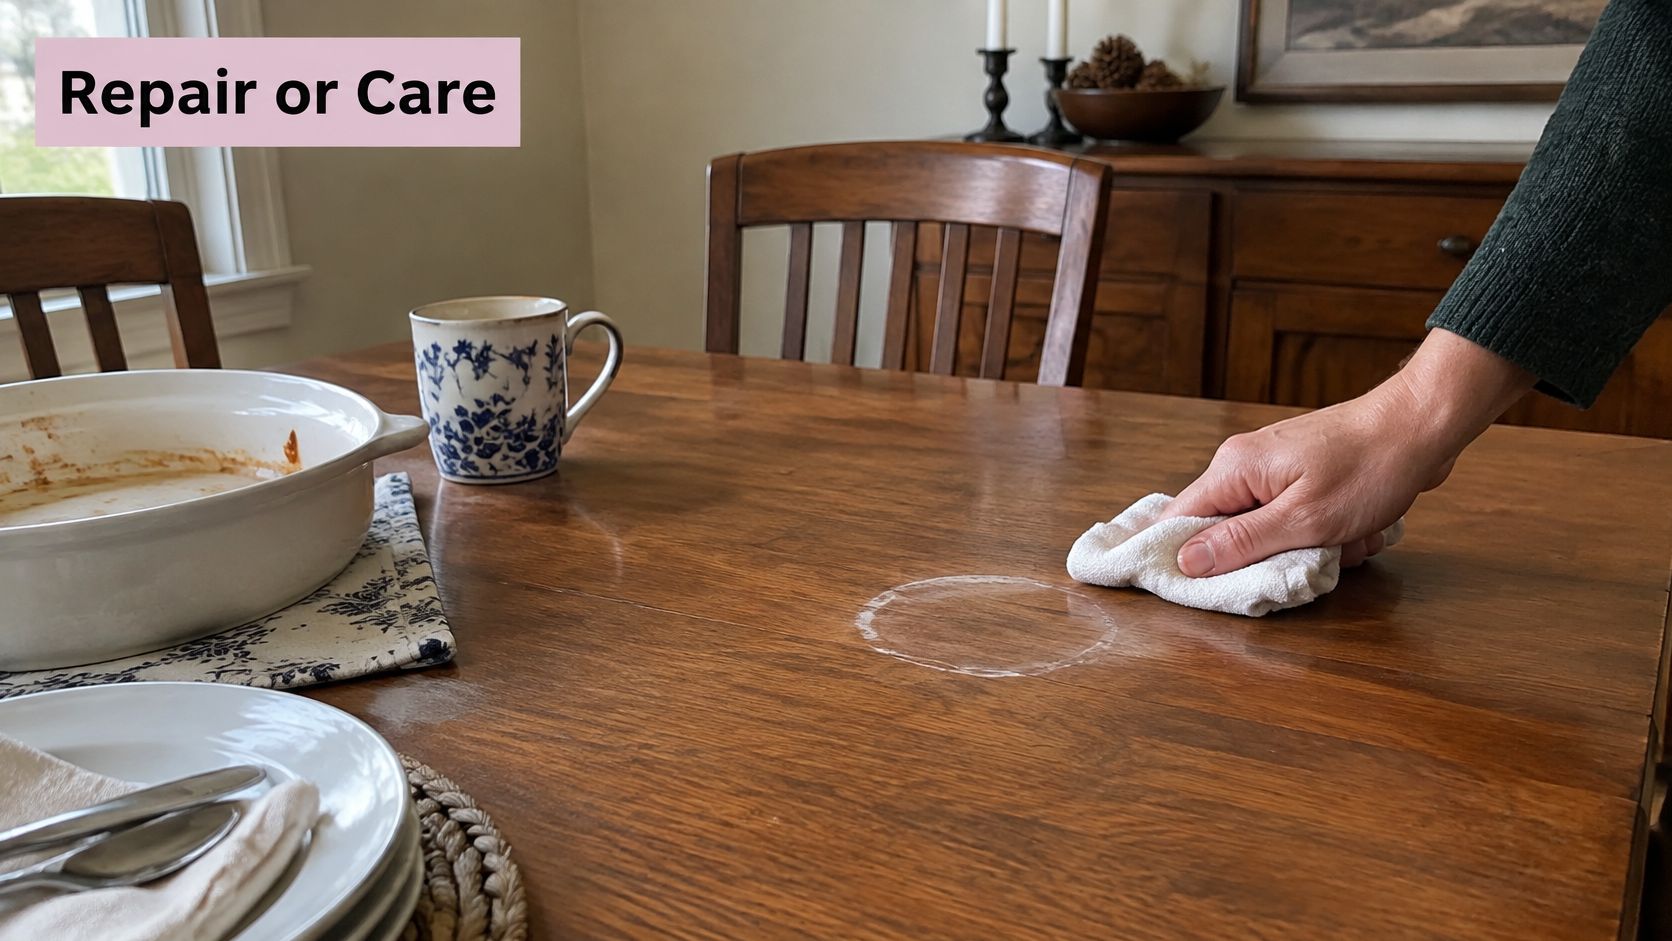
A fresh white ring on a Woodstock dining table may respond to one careful, low-heat pass if the surface is smooth and a hidden test leaves the finish unchanged. Sanding the spot would be out of proportion and could leave a visible patch. If the ring remains, stop rather than increasing the heat.
A brown oval on a Marietta home-office desk calls for a different response. Dust and clean around it, but keep heat off the discolored area: the color is not dirt, so repeated wiping will not restore the original tone. A furniture restorer can assess whether the change is in the stain, finish, or wood, and whether a localized repair may blend.
A black scorch beside a stove cart, especially with a smoke odor, is a stop sign. In a Dallas or Powder Springs rental, photograph the damage and contact the property manager or a furniture restorer. Renters should tell the landlord before attempting treatment. Brown or black color, blistering, cracks, smoke odor, or lifted veneer all warrant a professional opinion. A stable white ring may still be faint after one short dryer pass.
For prevention, the Suburban Furniture wood care guide offers background on guarding wood against scratches and stains. Prevention advice is not a reason to keep treating a mark whose texture has changed. If the finish is tacky, bubbled, or lifting, leave it alone until someone qualified can assess it.
Cleaning and restoration are different jobs. Maid in America is a locally owned cleaning company based in Kennesaw and serving homes, offices, and community amenities across West Georgia. Its licensed, bonded, and insured professionals use natural, low-odor products, and one experienced cleaner is assigned whenever possible. Services include basic residential cleaning, deep cleaning, move-in and move-out cleaning, post-construction cleaning, office and community amenity cleaning, and recurring service. Tell the cleaner which wood pieces need a gentle, dry approach so they can focus on surrounding dust and surface soil.
If a heat ring has you scrubbing harder without getting answers, Maid in America can clean the rest of your home while you protect the finish and decide whether it needs repair. Request an estimate and check service availability at Maid in America.





Maid in America provides reliable, personalized cleaning with natural products for homes, offices, and communities across West Georgia. Licensed, bonded, and insured, we’re locally and privately owned.
Get in touch with us today!
info@maidinamericaga.com