Grease Removal from Stovetop: Safe Methods That Work

By Friday evening, the stove tells the story of the week: skillet dinners, breakfast eggs, and a quick meal squeezed in after the commute. In a busy Kennesaw or Marietta kitchen, that faint grease halo around the burners can turn into a sticky film that a wet paper towel only spreads. You don't need to attack it with the strongest spray in the cabinet. You need a method that fits the appliance and the people sharing your home.
Table of Contents
- Stovetop Surface Compatibility at a Glance
- Glass-ceramic needs controlled scraping
- Gas parts and electric drip pans
The Real Job Behind a Greasy Stovetop
A clean stovetop should look good, but appearance is only part of the job. Effective grease removal from stovetop surfaces also means reducing combustible buildup and collecting oily waste instead of washing it into the plumbing.
Consider the usual end-of-week cleanup. Loose crumbs come away easily, fresh splatter smears under the cloth, and the brown ring beside a burner stays put. Those deposits need different treatment. Scrubbing everything with the same pad risks damaging the finish without removing the grease.
Why plain water disappoints
Water and oil don't readily mix. Soap and detergent contain molecules with water-attracting and oil-attracting portions, allowing wiping and agitation to lift grease rather than push it around, as explained in OpenStax's discussion of cleaning with soap.
That's why a small amount of suitable detergent, enough contact time, and a clean cloth can outperform repeated passes with water alone. It's also why adding more liquid isn't necessarily helpful. You want to lift and collect the residue, not flood the cooking surface.
The safety reason deserves equal attention. NFPA reports that ranges or cooktops were involved in 51% of home cooking-fire incidents from 2020 through 2024, making routine stove maintenance more than a finishing touch, according to its home cooking-fire report.
Practical rule: Choose the method by the surface first, the grease second, and the household's comfort third.
Before reaching for a bottle, make these decisions:
- Identify the material. Glass-ceramic, stainless steel, enamel, and removable burner parts aren't interchangeable.
- Assess the deposit. Fresh splatter needs less intervention than a layered, tacky patch.
- Consider sensitivities. Fragrance and ventilation matter alongside cleaning performance.
- Choose a repeatable schedule. A manageable maintenance habit is preferable to occasional aggressive scrubbing.
For homeowners, renters, and workplace kitchens alike, the strongest cleaner isn't automatically the right starting point.
Safety First Before Any Degreasing Begins
Turn every control off before you begin. A stove that looks inactive can still retain enough heat to make wet cleaning uncomfortable or dangerous. Don't use your hand to test a visibly hot cooking zone, and don't assume a burner is ready because the pan has been removed.
Follow this preparation checklist before opening a cleaner.
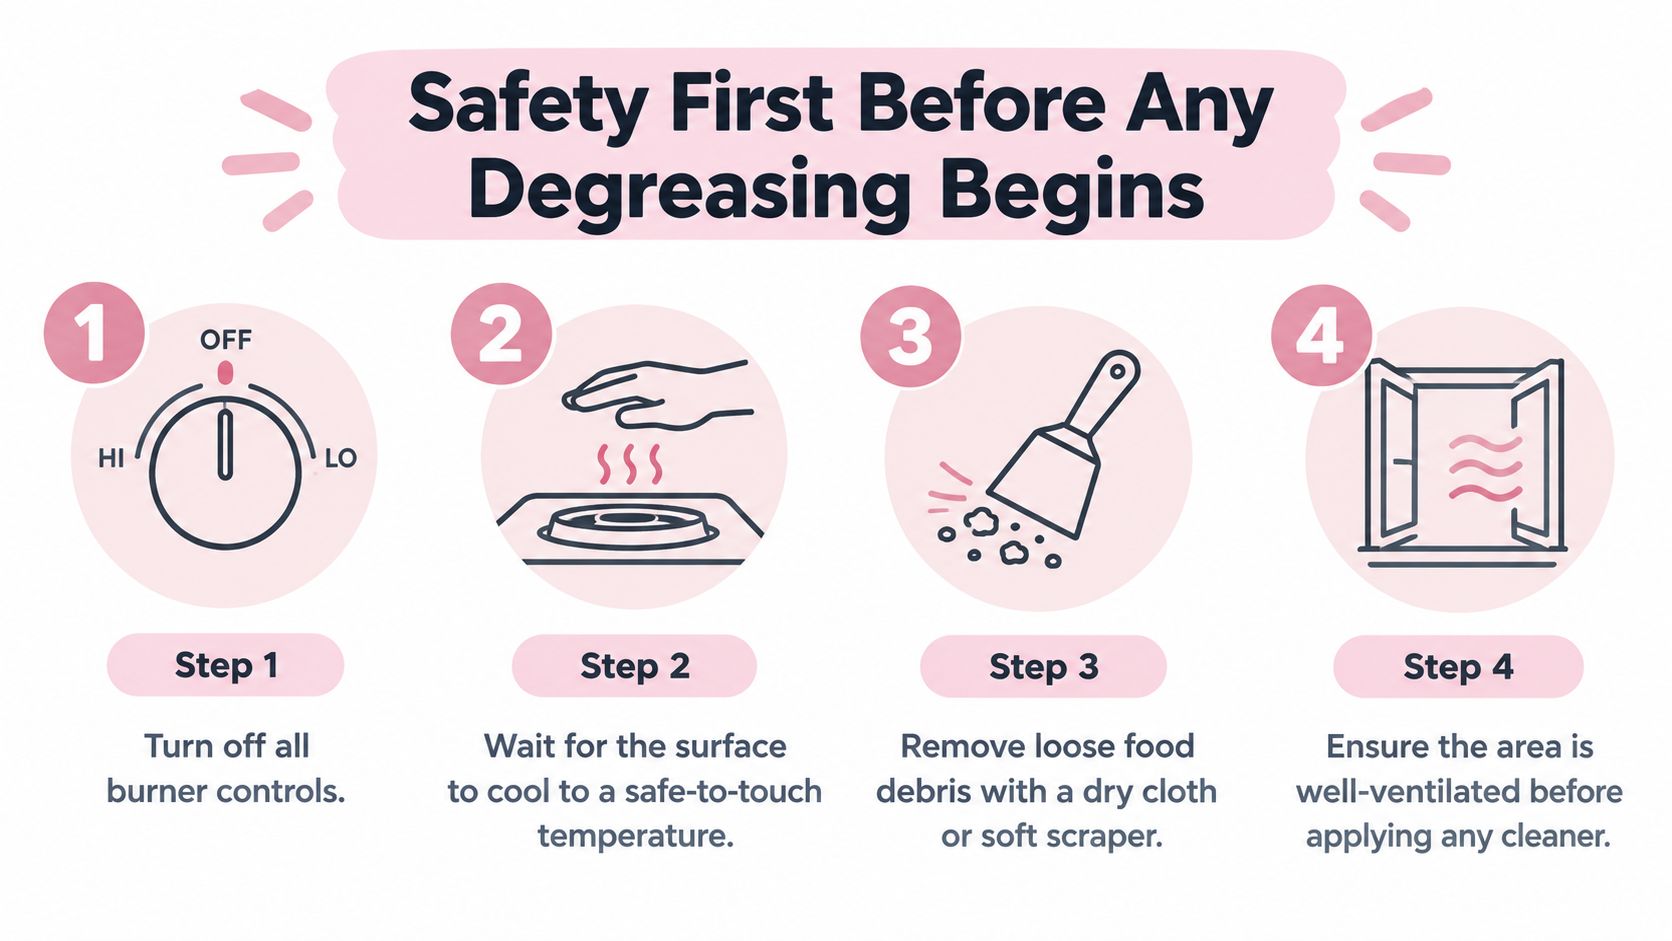
Prepare the appliance and work area
- Switch off all controls. Check the oven controls too if you've been cooking nearby.
- Allow a safe cool-down. Follow the appliance manual's cleaning instructions rather than improvising a hot-surface treatment.
- Collect loose debris. Lift crumbs with a dry cloth and absorb pooled grease before introducing detergent.
- Arrange ventilation. In a humid Acworth summer kitchen, establish airflow before using a strongly scented product.
Clear nearby food, utensils, and anything that could get in the way. Have separate cloths ready for lifting soil, removing cleaner, and drying. That simple preparation prevents the dirty cloth from becoming your finishing cloth.
Keep cleaning separate from fire response
If grease is actively burning, put the cleaning supplies down. For a small pan fire, NFPA advises turning off the burner and sliding a lid over the pan without moving it; never pour water onto burning grease, as explained in its cooking fire-safety guidance.
For ordinary maintenance, apply cleaner to the cloth where practical rather than spraying into burner openings. Keep moisture away from ignition ports, electrical controls, and connections. Removable doesn't necessarily mean washable, so check the manual before taking components to the sink.
Don't combine cleaning products. That includes improvised mixtures involving bleach, ammonia, or acidic cleaners. If you change products, remove the first product completely before proceeding, and follow the next label's directions.
A useful stop signal is uncertainty: if you can't identify a part's material, don't soak it or test an aggressive chemical on it. Confirm compatibility first. Replacing a damaged burner component is a poor trade for a faster cleanup.
Choosing a Degreaser That Fits Your Household
Start with the mildest compatible cleaner that can handle the residue, not the mildest product regardless of performance. A gentle product that requires endless scrubbing can become the wrong choice if you compensate with excessive pressure.
The cleaner families below offer different starting points, but the appliance manual and product label take priority over broad categories.

Mild soap versus stronger degreasers
Dish soap with warm water is a sensible starting option for fresh oily splatter on a compatible, cooled surface. Use a small amount on a microfiber cloth. If the cloth leaves a sudsy trail, reduce the product rather than adding more rinse water around the controls.
A stronger alkaline or solvent degreaser is an escalation option for stubborn deposits, not permission to use a workshop chemical on a kitchen appliance. Select a product specifically labeled for the surface, follow dilution and protective-equipment instructions, and honor its contact-time limits. The trade-off is more attention to compatibility, residue removal, and ventilation.
Escalate when a properly applied mild cleaner leaves a persistent tacky patch after wiping and drying. Don't escalate merely because you can still see a mark; discoloration and removable grease aren't necessarily the same problem.
Natural options need the same scrutiny
Plant-based dish soap can fit a low-odor routine, but homemade vinegar solutions and baking soda paste aren't universal substitutes for a cooktop cleaner. Baking soda introduces abrasion, while vinegar introduces acidity. The material-specific stovetop guidance discussed by The Pioneer Woman reinforces the importance of matching tools and chemistry to the finish.
- For fragrance-sensitive households: Compare labels rather than assuming a leafy package means little odor.
- For delicate finishes: Avoid powders or homemade mixtures unless the manufacturer permits them.
- For persistent grease: Try compatible softening before choosing a harsher product.
Before using an acidic homemade cleaner around appliances, consult these safe and effective kitchen uses for vinegar.
A product's “natural” description doesn't tell you whether it belongs on your particular stove.
For homes with children, pets, or fragrance concerns, product selection should include household comfort, not just how quickly a spray removes a visible spot.
Matching Your Method to the Stovetop Type
Identify the cooking surface and each removable component separately. A gas range may combine stainless steel, enamel, coated grates, and aluminum burner heads. Treating them all as tough metal is where otherwise careful cleaning goes wrong.
The matrix below is a starting point, not a replacement for model-specific instructions. “Safe” means permitted by the appliance manufacturer and the cleaner label.
Stovetop Surface Compatibility at a Glance
| Stovetop Surface | Safe Tools | Avoid | Best Cleaner Match |
|---|---|---|---|
| Glass-ceramic | Approved cooktop scraper, non-scratch pad, microfiber | Steel wool, abrasive powders, unapproved chemicals | Ceramic-glass cooktop cleaner |
| Stainless steel | Soft cloth used with the grain | Aggressive scouring and leftover cleaner | Compatible mild detergent or stainless-safe degreaser |
| Enamel or painted trim | Soft cloth, approved non-scratch tool | Harsh chemicals and abrasive scrubbing | Manufacturer-approved mild cleaner |
| Coated gas grates and caps | Non-scratch pad; soaking only when permitted | Assuming every coating is soak-safe | Approved detergent solution |
| Aluminum burner heads | Manufacturer-specified brush or cloth | Strong alkalis and unauthorized soaking | Cleaner specifically permitted for the component |
| Electric-coil drip pans | Soft cloth or compatible non-scratch pad | Wetting element connections | Cleaner approved for the pan's finish |
Glass-ceramic needs controlled scraping
For stuck deposits, use a scraper designed for the cooktop, not a loose blade improvised from a toolbox. GE specifies a scraper angle of approximately 45 degrees and complete cleaner-residue removal before reheating in its glass cooktop cleaning guidance.
Follow the manual's temperature requirements for scraping. Apply the approved ceramic-glass cleaner at the appropriate stage, work with a non-scratch pad, and polish as directed. Avoid steel wool, abrasive powders, chlorine bleach, and ammonia on glass-ceramic unless the manufacturer explicitly provides otherwise.
Gas parts and electric drip pans
Remove gas grates and caps only as the manual allows. If soaking is permitted, use soapy water at the approved temperature, then loosen softened deposits with a non-scratch pad. Don't assume hot-water soaking is suitable for every coating.
For clogged burner ports, follow the model's instructions for the specified brush or pin. Don't force a tool into an opening or enlarge it. Dry removable parts thoroughly and seat them correctly before use.
With electric coils, lift or disconnect elements only according to the manual. Clean removable drip pans separately without immersing electrical elements or connections.
Nearby finishes deserve the same caution. Jennifer Gilmer Kitchen & Bath's resource to compare kitchen countertop materials is useful when identifying adjacent surfaces before extending the cleanup.
Finish with a clean, lightly damp cloth where permitted, then dry. Examine the surface from an angle so missed film is easier to distinguish from a stain.
Lifting Baked-On Grease Without Damage
The brown, tacky patch beside a burner is the point where many people switch from cleaning to grinding. Resist that impulse. Controlled softening and lifting give you a better chance of removing buildup without trading grease for scratches.
A microfiber cloth and compatible cleaner should do the initial work. A scraper belongs in the process only when the surface manufacturer permits it.
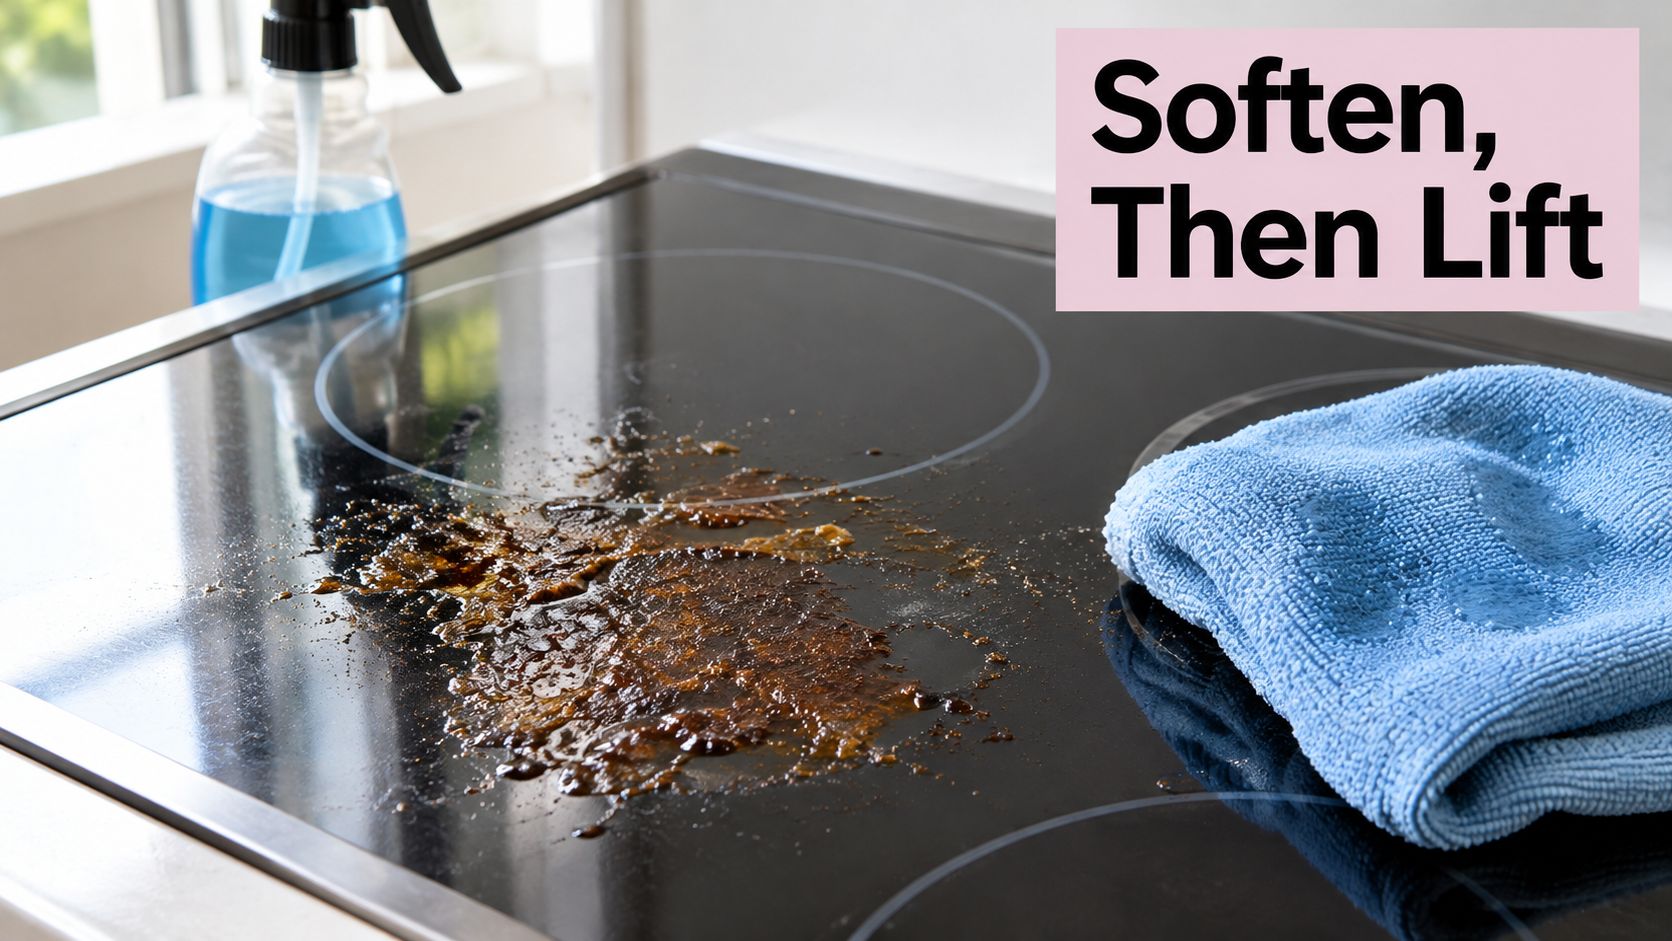
Soften, lift, inspect
Apply the approved cleaner to the deposit and allow the label's contact time. Where permitted, a warm, damp cloth on a cooled surface can help keep the patch moist during treatment. Don't leave cleaner sitting indefinitely or invent a universal dwell time.
Lift softened residue with the approved scraper or non-scratch pad, collect it on the cloth, and inspect before repeating. Turn the cloth to a clean face instead of dragging the same brown smear across the stove.
- If residue softens: Repeat the controlled treatment rather than increasing pressure.
- If the finish looks different: Stop, remove the product as directed, and reassess compatibility.
- If considering baking soda paste: Use it only where explicitly permitted; it isn't a scratch-free default.
Protect the finish: More pressure isn't proof that the cleaner is working.
Don't use heat as a shortcut
Never turn on a burner to speed up grease removal. Hot surfaces can make wet wiping hazardous, and some cleaners can release unpleasant fumes when heated.
There's a narrow exception for certain glass-ceramic contaminants. BORA notes that sugar, plastic, or tin foil may require immediate hot-surface removal with an appropriate scraper because they can fuse to the cooktop; its cooktop cleaning guidance distinguishes that situation from ordinary cooled-surface cleaning.
Keep nearby stone out of improvised treatments too. Varun Marbles' marble-cleaning resource offers separate reading for that material, rather than treating stovetop chemistry as a countertop recipe.
If the same cooking session also left the oven door cloudy, use a separate inside oven-glass cleaning method. Don't assume the cooktop's scraper or chemical instructions transfer to the oven.
Smarter Disposal and Healthier Indoor Air
A stovetop can look clean while the cleanup creates another problem. Pouring collected grease into the sink or filling the kitchen with fragrance isn't a good finish to otherwise careful work.
Collect the heavy grease before washing. Scrape or absorb cooled deposits, and place collected cooking grease in a sealed container for household trash or an appropriate recycling program.
Keep grease out of the drain
EPA information summarized by Clemson identifies grease as the most common cause of reported sewer blockages, accounting for 47%, according to its fats, oils, and grease pollution guidance.
Hot water and detergent can move grease temporarily, but they don't make it disappear. It can cool farther along the plumbing and reform into an obstruction. That's why rinsing a heavily greasy cloth or pan without first removing the bulk residue misses an important part of the job.
Use absorbent material for thick deposits, and reserve washing for the remaining light film. You don't need to chase every trace with disposable towels, but you shouldn't send a puddle of oil into the sink either.
Judge products beyond their scent
A fresh smell isn't evidence of cleaner air. EPA recommends ventilation, minimizing indoor cleaner use, considering milder options such as soap and water, and looking at products carrying the Safer Choice label in its indoor particulate-matter guidance.
- Establish airflow: Open a window when practical or use appropriate kitchen exhaust.
- Continue ventilation: Keep air moving during cleanup and afterward as the product label directs.
- Choose deliberately: Plant-based labeling alone doesn't establish low emissions, non-irritancy, or effectiveness.
- Respect household sensitivities: Select lower-odor options and avoid unnecessary fragrance around sensitive occupants.
There isn't a universal ventilation duration suitable for every kitchen and cleaner. Follow label guidance rather than a made-up timer.
For a family cooking regularly in Woodstock or a shared office kitchen in West Cobb, a comfortable result means no lingering cleaner residue, unnecessary fragrance, or greasy waste waiting beside the sink.
A Simple Weekly Routine and When to Call in Help
Build the routine around cooking habits, not an arbitrary promise of instant results. After frying-heavy meals, address visible splatter once the appliance is ready for cleaning. Give the entire stovetop a weekly inspection and material-specific degrease as needed.
A quarterly reminder can help you review drip pans, burner surrounds, and accessible range-hood surfaces, but sticky or layered residue shouldn't wait for the calendar. Indiana's cooking-safety guidance specifically recommends cleaning grease and food residue from stovetops to reduce combustible buildup.
Troubleshoot the finish
- Streaks on glass-ceramic: Remove remaining cleaner using the approved finishing method, then polish with a clean cloth.
- Oily haze on stainless steel: Switch to a fresh cloth, remove residue, and finish with the grain.
- Brown spots on drip pans: Repeat compatible softening; stop if the remaining mark appears to be damaged finish rather than transferable soil.
Your endpoint is practical: no continuous oily film, no tackiness, and no residue transferring to a clean white cloth after drying. A stubborn stain alone isn't a reason to keep scrubbing.
Choose maintenance or a reset
Busy commuters, holiday hosts, renters preparing to move, and retirees aging in place may need different levels of help. This comparison of deep cleaning versus regular cleaning can help distinguish ongoing upkeep from a more detailed reset.
Maid in America, locally and privately owned by Vicky Bates, offers Basic maintenance cleaning, Top-to-Bottom Deluxe/deep cleaning, and recurring service. The company is licensed, bonded, and insured, uses carefully selected and trained cleaners, and usually assigns one dedicated cleaner to each home for consistent, personalized service.
That support is available to homeowners, renters, and businesses in Kennesaw, Acworth, Woodstock, Cartersville, West Cobb, Marietta, Dallas, Hiram, and Powder Springs, plus nearby communities in Cobb, Cherokee, Paulding, Douglas, and Bartow counties. Office cleaning and HOA clubhouse and community amenity cleaning provide options for shared spaces too.
Maid in America offers health-conscious cleaning with natural, low-odor products, including kitchen maintenance and deeper cleaning for accumulated stovetop grease. “Add sparkle and shine with your health in mind.” Visit Maid in America to request a free estimate online, or call 770-427-4448 to discuss your cooktop, household sensitivities, and cleaning priorities.





Maid in America provides reliable, personalized cleaning with natural products for homes, offices, and communities across West Georgia. Licensed, bonded, and insured, we’re locally and privately owned.
Get in touch with us today!
info@maidinamericaga.com